Data Export
Various information related to an incident report or multiple incident reports can be exported to an Excel or comma-separated value (CSV) formatted file by using the Data Export feature of the CMS. Templates can also be created to quickly export data periodically and to schedule a data export report sent via email. To get additional information on scheduling reports click here.
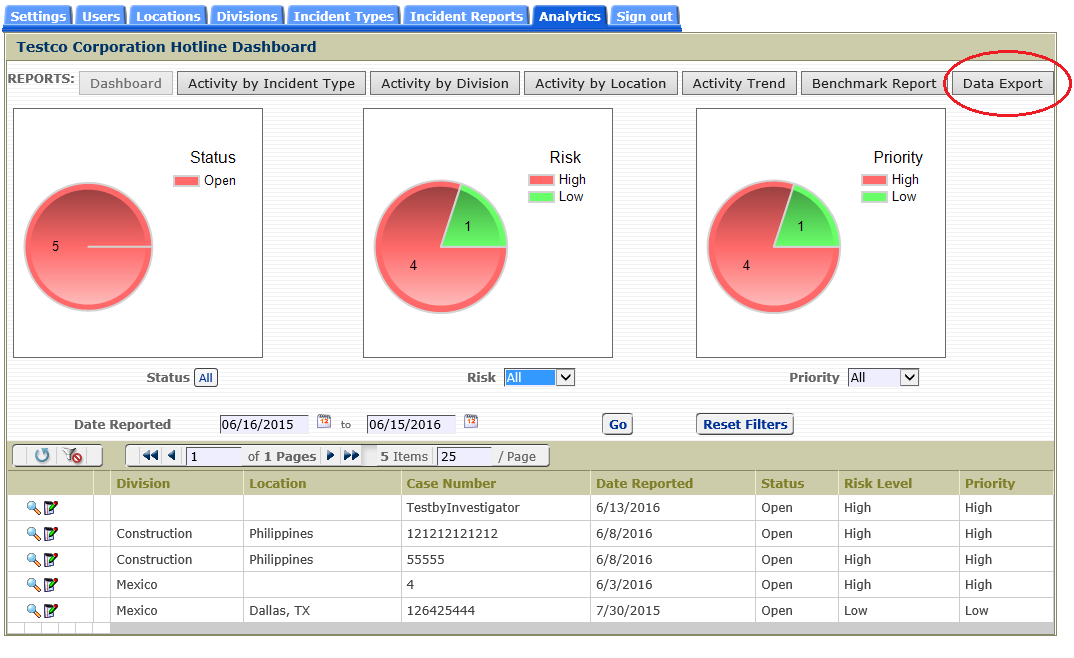
The Data Export feature is located on the Analytics tab as shown circled in red below.
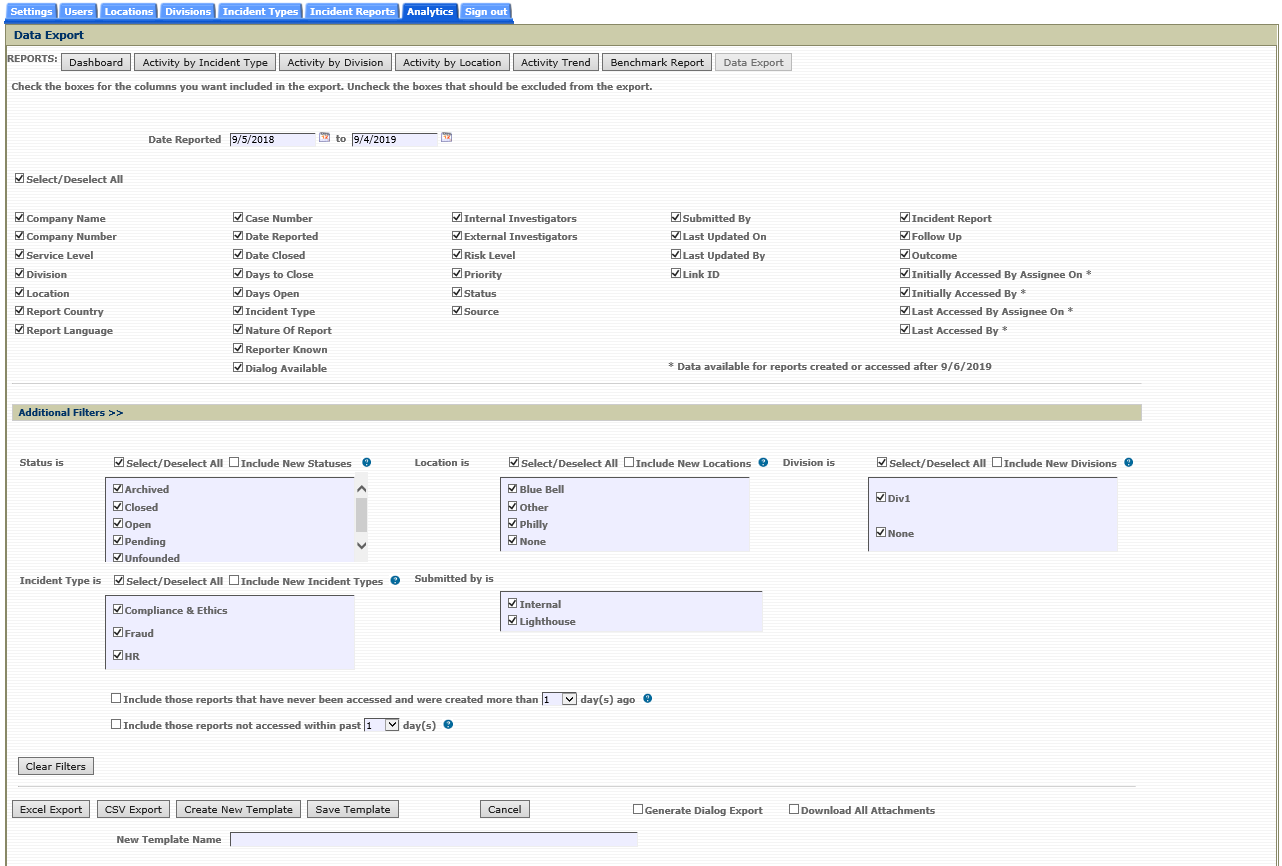
To include the dialog associated with the reports being exported, check the 'Generate Dialog Export' checkbox. To also download the file attachments associated with the reports being exported, check the 'Download All Attachments' check box. To export only incident report data, leave those checkboxes unchecked.
The Data Export page is shown below. Initially, the Additional Filters section is collapsed and can be expanded by clicking on the Additional Filters section.

Select the data fields to be exported, select the preferred filters, and click on the Excel Export button for an Excel-formatted export file or click on CSV Export button for a CSV-formatted export file. Click on the Clear Filters button to clear all of the filters in the Additional Filters section.
If either of the 'Generate Dialog Export' or 'Download All Attachments' checkboxes are selected, a zip file will be generated. That zip file will include one file that contains the report data, one file that includes the dialog associated with the reports (if applicable), and the file attachments for those reports (if applicable). All of the dialog will be included in a separate file in the Excel or CSV format depending on the export button selected. Each file attachment name will contain the case number and an index number to ensure uniqueness (e.g. 12345_001_picture.jpg).
Creating a Custom Data Export Template
A custom template allows a user to save the checked options so that the same data export can be generated in the future without having to select each field manually. To create a template, check the fields that are to be included in the data export and then click the 'Create New Template' button. After clicking the button a New Template Name' field will be displayed as shown below.
Enter a name for the template in the 'New Template Name' field and click the 'Save Template' button.
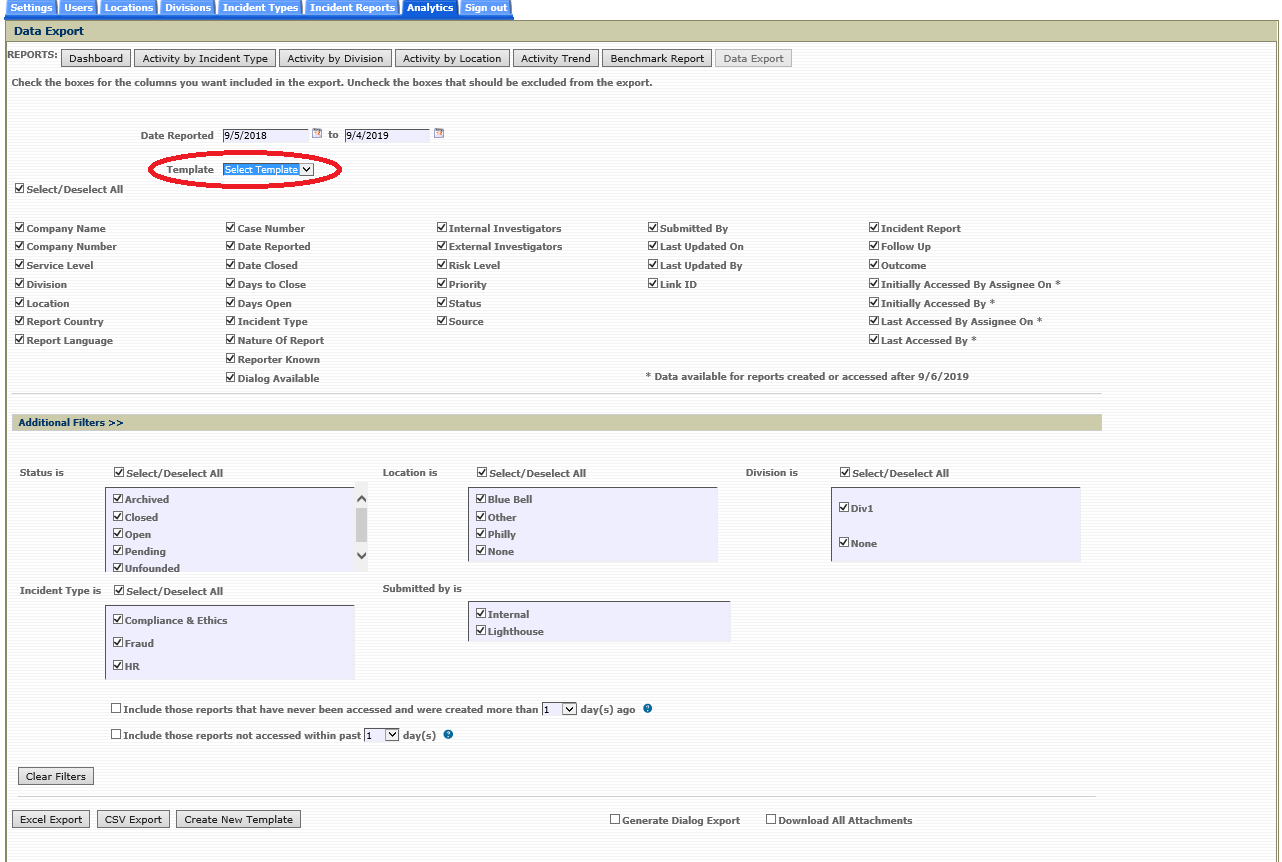
When templates exists for a user, the Data export page will include a dropdown list for the user to select a template as shown below.
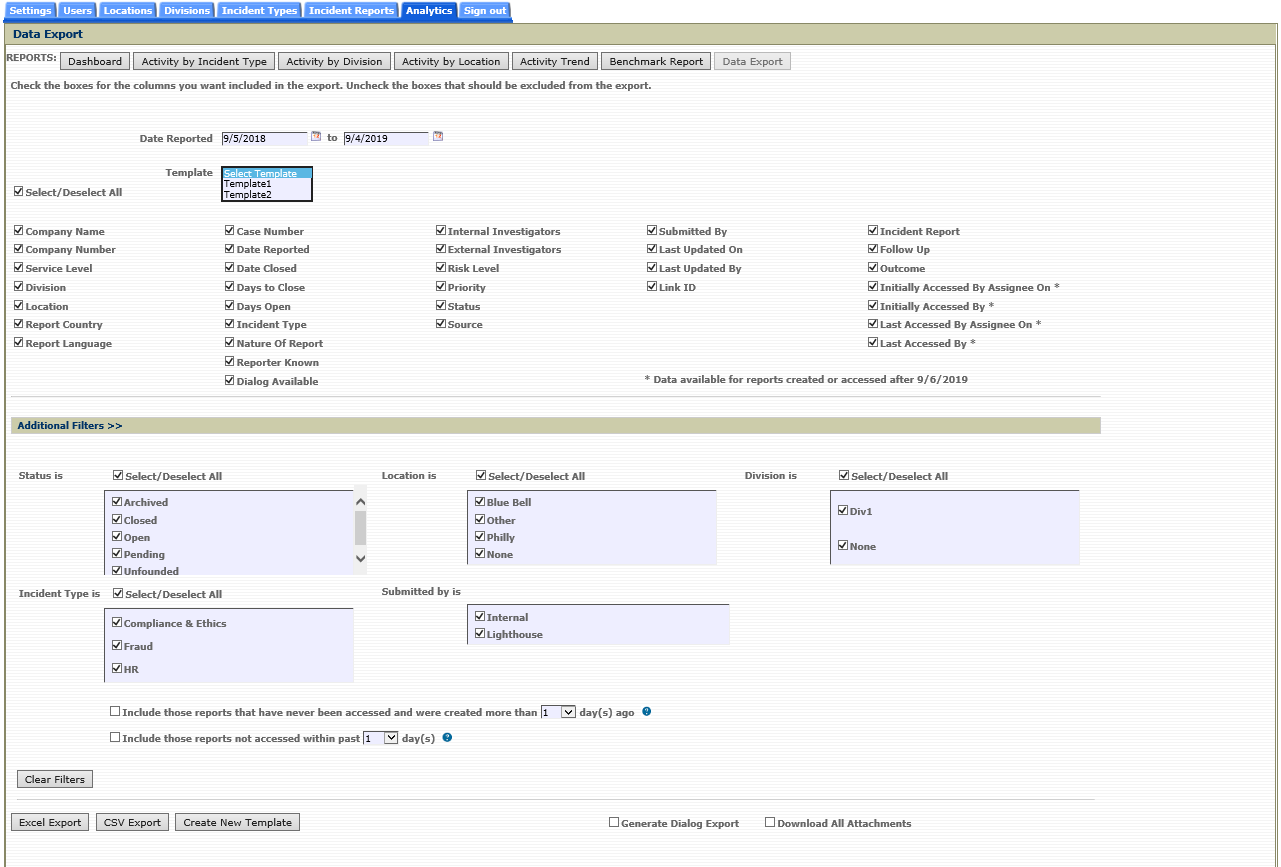
After selecting a template, the user can also choose to update the template by selecting/unselecting checkboxes and clicking the 'Update Template' button or can delete an existing template by selecting the 'Delete Template' button. The picture below shows the Data Export page after selecting the 'Summary' template previously created by this user.
Email Report
An Email Report checkbox will be displayed for Enterprise Service Level users only. To find out more information on this feature, click here.