
The Incident Types tab is where administrators add, delete, edit, and view company-specific incident types.
The Incident Types page is shown below.
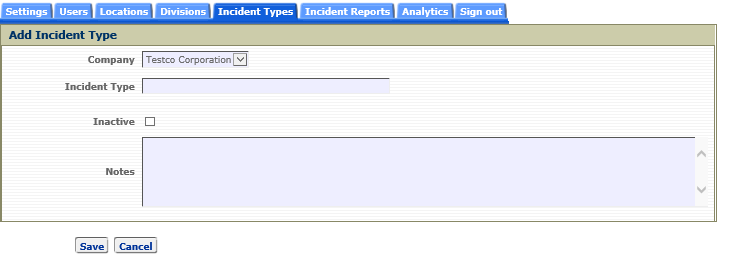
Adding a new incident type is quick and easy

The Add New Incident Type is shown below.
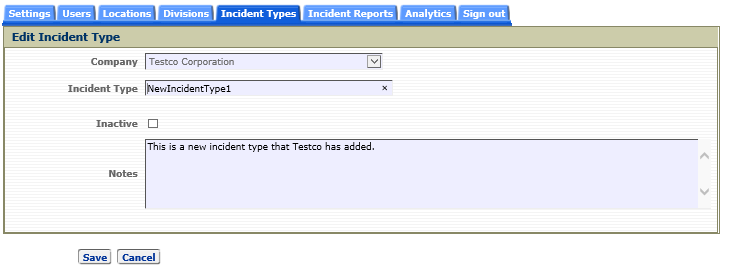
Editing an Incident Type
 , and the Edit Incident Type page will display.
The edited incident type will then be available on the Add/Edit Incident Report page.
The Edit Incident Type page is shown below.
Inactive Incident Type
An incident type can be made inactive by checking the Inactive checkbox. This would prevent that incident type from being listed in the Incident Type dropdown field on the Add/Edit Incident Report pages. Inactive incident types cannot be included in a new auto-assignment rule.
Deleting an Incident Type
Delete an incident type by clicking the delete icon, , in the row of the incident type you wish to delete. After you click on the delete icon you will need to confirm the deletion. Only company-specific incident types can be deleted. An incident type can only be deleted if it is not referenced on any report in CMS.