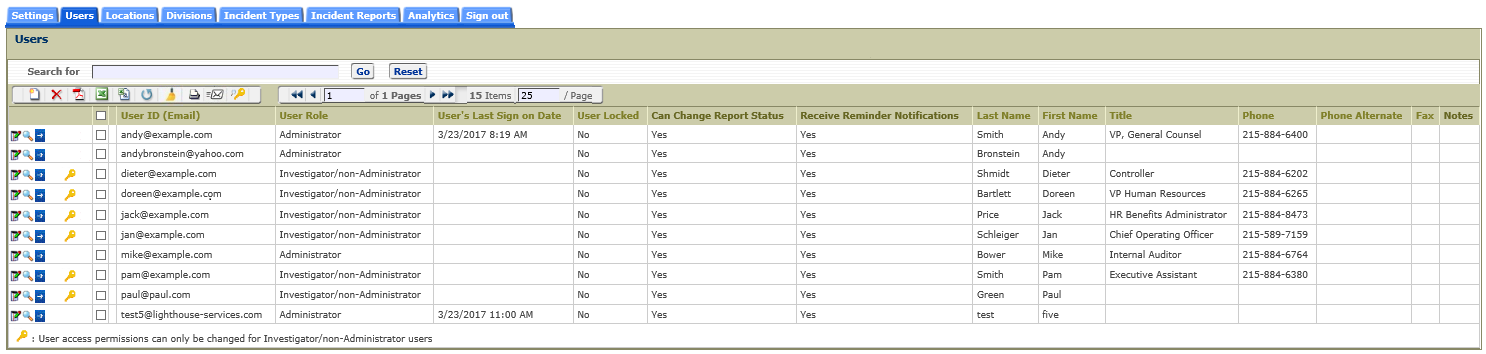
The Users tab is where administrators (or users with appropriate access permissions) add, delete, edit, and view users who have access to the CMS. This tab is also used to lock out a specific user from CMS, expire a user's password, set user's access permissions, create the user's rules, and transfer assigned reports from one user to another user.
It is typically the administrator’s responsibility to manage users in the CMS. Please see the instructions below. It is very easy to add and delete users to the CMS.
There are two roles for users: Administrators and Investigators/non-Administrators:
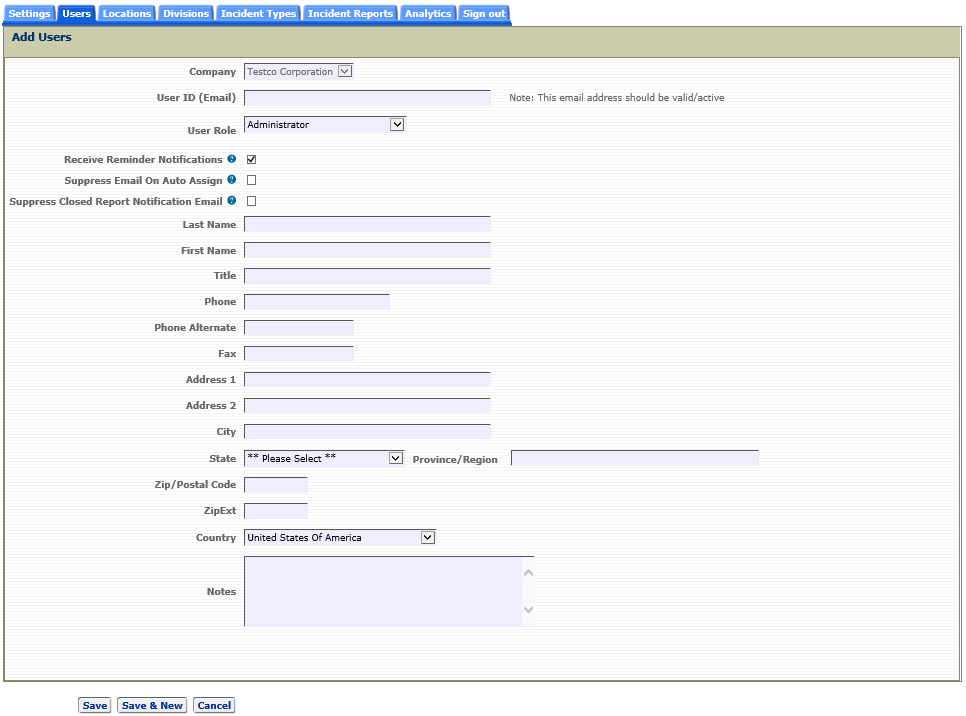
Adding a new user is quick and easy

When an administrator user is added and there exists reports that are 'Restricted', you must notify Lighthouse if this new user should also be restricted on those reports.
Remember: An Investigator/non-Administrator role user must be assigned (either manually by the administrator or by an auto-assignment rule) to a specific report to allow them access to that report.
Note: You can identify which reports are assigned to a specific user by clicking on a user's "Show Record" icon,  . This will display all reports assigned to that user.
Non-CMS User Note: When a user does not need access to the CMS but would like to be a report recipient or a recipient on month end activity summary reports, there is a checkbox displayed when the User Role selected is Investigator/non-Administrator. Checking the non-CMS checkbox will prevent this user from accessing the CMS. The user can be identified as a report recipient or a month end activity summary report recipient on the Rules page.
Clients at 'Basic' Service Level are limited to a maximum of 2 users. Clients at 'Advanced' Service Level are limited to a maximum of 10 users.
Editing a user
There are many fields on the Edit User page that can be modified.
 , and the Edit User page will display.
The Edit User page is shown below.
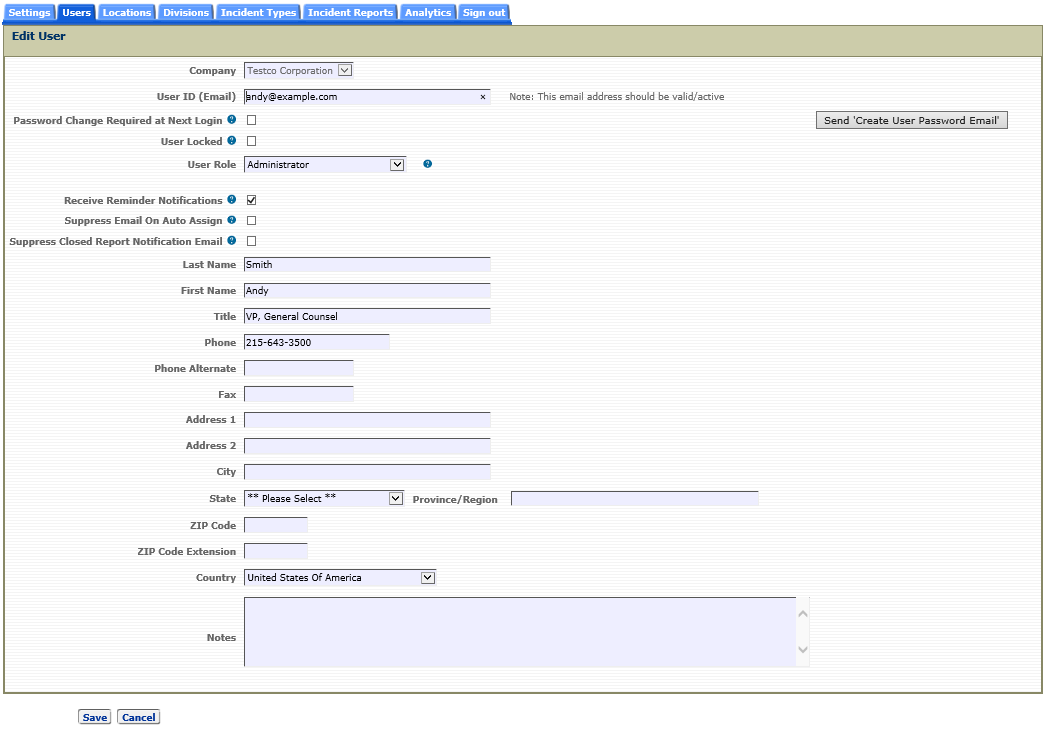
To change the User ID, edit the contents of the User ID (email) field and click the Save button. An email will be sent to the user informing them that their user name has changed. The next time the user signs in to the CMS, they will need to use their new user name.
Note: The User ID must be a valid and active email account as the CMS uses this email address to communicate incident report/user account information to the CMS user.
Expiring a user's password
To force a user to change their password at their next login, check the Password Change Required at Next Login check box and click on the Save button.
Locking a user's account
To prevent a user from signing in to the CMS check the User Locked check box and click on the Save button. The next time the user tries to sign in to the CMS, they will be presented with an alert message informing them that their account has been locked. At the time when a user account is locked, there is no notification email sent to the user. When a user account is unlocked, a notification email is sent to the user informing the user that the account has been unlocked. To unlock a user, uncheck the 'Lock User' checkbox.
Send 'Create User Password Email'
The administrator can resend the email that was created when a new user was added to CMS by clicking on the Send 'Create User Password Email ' button. The CMS will send an email to the user with a link that will allow the user to create a password for the system.
non-CMS User
When a user does not need access to the CMS but would like to be a report recipient or a recipient on month end activity summary reports, there is a checkbox displayed when the User Role selected is Investigator/non-Administrator. Checking the non-CMS checkbox will prevent this user from accessing the CMS. The user can be identified as a report recipient or a month end activity summary report recipient on the Rules page.
Receive Reminder Notifications
The administrator can allow a user to receive reminder notifications when the company's 'Send Reminder Notifications to Investigators' setting is enabled (checked) on the Settings page. If the notification/interval values at the company level are set to zero, the user will not receive any notifications.
Suppress Email on Auto-Assign
The administrator can prevent a user from receiving an email when the CMS auto-assigns a report to that that user.
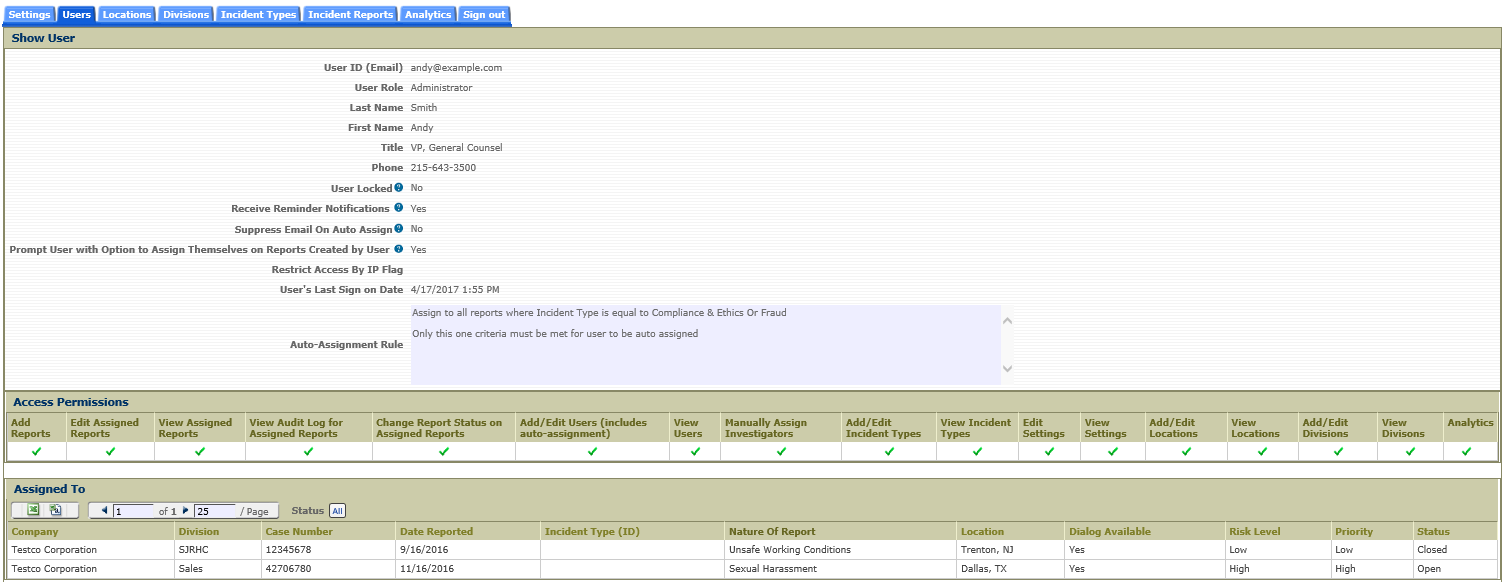
Viewing User Information
Select the Show Record icon, , to view a user's information. Selecting this icon will display the Show User page shown below. This page displays all of the user's information, their CMS access permissions and all reports they are assigned to.
Transferring Assigned Reports
Transferring a user's assigned reports to another user can be done by selecting the Transfer Reports icon, ![]() , on the Users tab. Selecting this icon will display the Transfer Reports from User page shown below.
, on the Users tab. Selecting this icon will display the Transfer Reports from User page shown below.
![]()
To transfer all of a user's assigned reports to another user,
Manage User Access (Dynamic User Profile)
The CMS provides the administrator (or a user with appropriate access permission) with the ability to assign specific access permissions to each user by clicking the Manage User Access row icon, ![]() . Click here to get additional information on the Manage User Access page.
. Click here to get additional information on the Manage User Access page.
Note: A user defined as an Investigator but given access permission to user administration functions can perform all of the tasks mentioned above with the exception that the tasks performed are limited to other users defined as an Investigator role.
Deleting a User
Delete a User by clicking the row checkbox and selecting the page delete icon,  . Confirm the deletion upon request.
Note: Deleting a User from the CMS will automatically remove their email address from the “Internal Investigator” field where they were assigned as a report investigator. Any investigative notes they previously added to reports will be retained.
Additional Page Toolbar Functions
Manage Rules
The Manage Rules page toolbar icon,  , allows access to the page where auto-assignment, report recipient, and month end summary report rules are managed. To get additional information on the rules feature click, here.
Show User Access
The Show User Access page toolbar icon, ![]() , allows access to the page that displays all of your users and their corresponding CMS access permissions. The Show User Access page is shown below.
, allows access to the page that displays all of your users and their corresponding CMS access permissions. The Show User Access page is shown below.
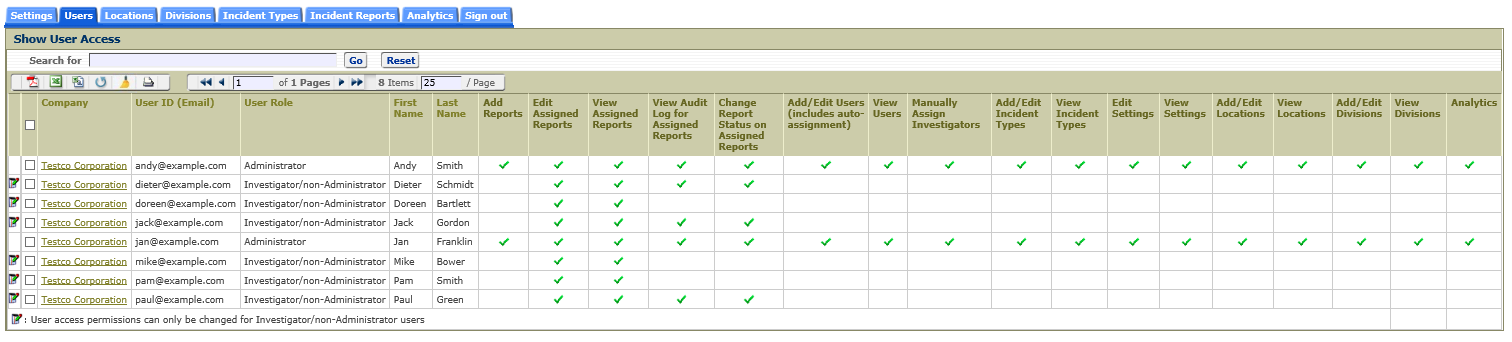
This page shows the current access permissions for each user. To get additional information on the Manage User Access feature, click here.